Thursday, 5 November 2015

Turkey Shed - Part The Second

Turkey Shed
The Now Upright Turkey Shed

There's been a bit if a pause between Turkey Shed updates. This is mainly due to the weather. We managed to, after my last post went out, get the four walls up and, as we thought, secured.

How wrong we were!

We weren't able to continue work the following day, so it had to sit for two days without a roof. Then the wind came. Although we weren't that convinced that it was that strong a wind, our morning trip to see the animals proved us wrong. The front and one of the end panels had fallen down outwards. Part of me wished all four had fallen down, just for the comic value of that photograph!

Luckily nothing was broken so we popped them back up and secured them properly. The roof needed re-felting, so while I took the Tinys on the most stressful Halloween outfit shopping trip ever! (Don't ask!), himself put the felt on.

Once I got back, and littlest Tiny went for a nap, we managed to lever the roof into place and secure it.

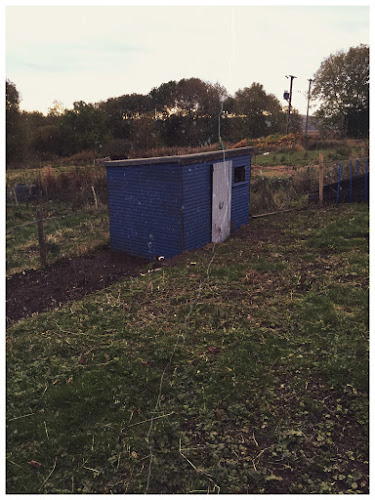
With the roof on and all the screws in place this shed is going nowhere!

We hope.

And I know what you are thinking, looking at that photo. How do you open the door? It's true, the shed fitted exactly in that space we made. But the plan is to dig out a 'channel' to the door and put in steps going down the hill.

We also need to lay a concrete floor and after doing some calculations we realise that we'd be better getting our sand from a builders merchant and have it delivered. So, that's next on the schedule.

The Turkey Shed continues..


Saturday, 31 October 2015

Wednesday, 21 October 2015

Can You Dig It? - The Turkey Shed. Part: The First.

Digging a Hole
Levelling the ground and Making Some Space

Our idea this year was to raise our own turkeys for Christmas, well this has failed.

We were very keen on the idea and planned to take on around six little ones and raise for friends and family for Christmas time. Our first step was to get a shed. So I put up a request on our local Freegle page, basically "Shed, please."

I wasn't expecting much. Not many people happen to have a shed lying around that they just want to give away. After a couple of weeks I decided that I'd have to start looking at prices for secondhand sheds. And that was when the email arrived. Someone had an old 6x8 shed (formally used for chickens) that he'd dismantled ready to chuck out, and never got round to it. It was ours if we wanted it.

Did we ever!

The shed was in great condition. The roof needed refelting but beyond that there was nothing else that a lick of paint couldn't fix! We loaded it up.

The next step however was getting the position for the shed prepared. We dawdled. And procrastinated. And ummed. And errrred. And took too long, so we missed the deadline for getting the turkey chicks for this year. But with the shed leaning up against a barn wall we still had to get it erected, there's no way it would survive the winter as it is.

Digging
Flattening Out the Ground

So we decided to get stuck in. The position we have chosen is at the bottom of a slight slope and the flat area is just too small for the shed.... So bring in the big guns...

We had to clear the area and flatten it as much as we could so the shed will stand sensibly. We also intend to put in some, cemented in, posts to fix it too. We get some major wind on top of our hill and we don't want this thing drifting away!

Farm Guy got a great chance to play with a big new toy, so he was happy! Although we did have to take down a fence in order to get the digger in!

We followed our land "flattening" with the digging of some post holes. Once these were dug out we used post cement and water carried in a couple of our thousands of plastic bottles (watch this space for more on those). Soon the corner posts were in and it was just a case of waiting for the cement to dry before we can put the walls on.


Picture of the Field
Our Newly Flattened Spot


Monday, 5 October 2015