Sunday 30 January 2011

A Great Header....


Since Farm Baby came into our lives I have noticed that everything is incredibly noisy!  I don't mean her, but everything else!  She was having her nap and, most unusually for her, she had struggled to drop off.  She had been moved from one place to another but none suited her today.  Eventually after dropping off once of Farm Guy then waking up I managed to get her to sleep in her sleeping tent thing (?).  At this point I decided to have a nice glass of fizzy juice, Irn Bru if anyone is interested!  And I remembered to exit the room to avoid any crazy hissing as I opened the bottle disturbing the sleeper.  I came back in and began pouring and MY GOD how noisy is juice going into a glass!? 

I never noticed until I need to be quiet how loud everyday things are!  We must be surrounded by noise all the time and just not notice it.  No wonder we notice the quiet when we finally are in it!

Anyway, you may have noticed that the picture has nothing to do with that story!  But it does have to do with Farm Baby.  Our little one is not bald but she looks it as her hair is so fair, so I decided that as a lady she wouldn't want people staring so I decided to try my hand at making some headgear for her.  (There is a dress attempt coming up so prepare yourselves for that!)  I have been practicing fabric roses but I won't give you a tutorial on that as I went searching myself, but I will direct you to the best written tutorial I found - Portobello Pixie's Tutorial.  Actually her site has a few great tutorials so you could check them out.  So once I had my Rolled Fabric Rose I had to make a headband for it to go on.  

I had some stretch jersey fabric in my hobby cupboard so I cut out a strip 2.5" (6cm) wide and 15" (38cm) long.  Putting right sides together I sewed up the long side, creating a tube.  Using a knitting needle I turned the tube inside out.

Next I put it round Farm Baby's head and marked the size I needed, trimming off the excess.  I overlapped the ends slightly (not further than the head band is wide) and sewed them together.

To cover the join I used the excess I had cut off the band and wrapped it over the join, sewing it at the back.  This make a nice little headband on its own and of course can be done in any colour.

I wanted to make the band 'reusable' so I sewed a safety pin on the back of the rose.  Not the easiest thing to do, I think next time I would use perhaps a small crocodile clip and some hot glue, but a safety pin was all I had.  Now she can wear the band with or without the rose! Ta Daaaa!

You may have noticed the "crystals".  Years ago I tried beading and I have the leftovers in the Hobby Cupboard, I found a few pale blue ones, as I thought they'd look like raindrops and sewed them on.  Obviously if you are doing these for babies the beads must be WELL secured so I would recommend sewing them on rather than gluing, or I guess you could do both, and ensuring the thread is secured well.


I intend to do a more universal one, probably with a white, cream or stretch lace headband, so I can then make a rose or ribbon for each outfit and it will go with the headband, red is a bit limiting!

Have a good one...

Friday 21 January 2011

Let's Hear it for Freebies!

You have to love freecycle! I just got me a mammoth amount of cross stitching stuff. A lady posted that she had three carrier bags full of cross stitching bits and pieces, threads, charts and loads of the freebies off the front of magazines. They were free to a good home so basically 'come and get 'em!'  I was expecting there to be a reasonable amount but Oh My Goodness! 


I have tried to fit it in in this photo but its a bit of a squeeze! There must be a good hundred little cross stitch kits and thread by the ton!  The rest is made up of books containing hundreds of charts, as well as other 'front of mag' freebies like chart magnifiers and thread cutters and frames... the list goes on!  My evenings are well and truly filled till 2033!

For those who aren't familiar with Freecycle it is a website that allows people to advertise the stuff they no longer want that other people might want.  The only real rule is that the stuff must be given away for free.  You can also post on the sites asking if anyone happens to have what you are looking for!  I have seen cars and caravans on there, they need some work, but if you have the time then there is a project for you!  I love it as it is a great way to get rid of what you don't want and know that it is still being useful somewhere else, not sitting rusting in a corner!

Sunday 16 January 2011

Getting Myself Organised

So, I decided that I needed to get organised. Well, at least a little less disorganised!  So in true me style I had to get a little creative with this too.  I made myself a nice little "To Do List" and a "Weekly Planner".  I have to admit that I didn't get as creative as it appears, the amazing graphics are courtesy of Graphic Garden.  I LOVE the graphics on this site and I use her free downloads of cards for all my notey needs!  And these amazing graphics are from her websets.  Please check her out next time you need anything cute and cheerful, she makes them all herself!

My "To Do List" is designed for all those tasks that need to be done, the non-everyday repetitive stuff, like painting the hall, finishing the art for Farm Baby's room, that sort of thing.  And I added nice tick boxes to the end so I can have the satisfaction of announcing "DONE" every-so-often.  These are my tasks, they don't include things like dig potato patch as, although I am the gardener, that is a "Whoever-has-the-time" job and also the "whoever-I-can-get-to-do-it-as-it-sounds-like-hard-work" task!

My second list is my weekly list where I am going to note down what day I do certain stuff, hoover, laundry, change bed linen, whatever I can think of, this is the repetitive boring household stuff!  Hopefully this selection of handy lists will mean that I can plan and organise my days a bit better around Farm Baby - who is getting awful big - and the other things (see above!) that I have to do!  At the moment life is chaotic so this may calm it down. 

On a more exciting note I got my new hoover, first time I've had a hoover in about 6 months!  What an exciting Thursday last Thursday was!  What was I doing for the past 6 months?  I hear you ask - I was sweeping - yes, sweeping, the carpets!  So I was happier than anyone should be hoovering last week as it was so quick and easy!!

Saturday 8 January 2011

A Money Saving Mummy - Fabric Letters

I was roaming the shops just the other week (it was my birthday and I was looking for the obligatory 'present for myself!') and I spotted these lovely material covered letters that I thought would look great in Farm Baby's room.  However, the shop they were in was charging £10 a letter and, much as we love farm baby, to spell out her name would cost close to £100 and that just wasn't on.  So in true crafting style I decided that I could make my own - for a fraction of the price!

As I was doing it I decided that I would try and make a tutorial so others can do the same thing!  This is my first ever attempt at a tutorial so be kind! (But please leave a comment if you need anything clarified!)

The ones in the shop were a board backed piece of foam wrapped in material.  I had originally thought to do this as well but in the end I decided on simply making them solid.  If you want to make them 'squashy' then you would need to buy flat wooden letters and foam: cut foam to shape and glue to the wooden letters, then follow below.


Material Covered Letters

You will need:
Board Box Letters
Material in your chosen colour scheme
Fabric Glue
Scissors
An Iron
Pencil or fabric chalk


Place your letter on the material and cut around.  You will need to leave a margin around the entire outer edge.  This margin should be just narrower than the depth of you letters.

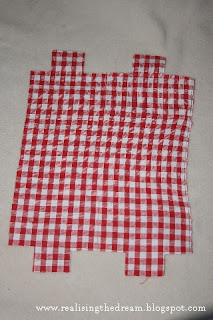
Mark each corner, both inner and outer, of your letter. The for outer corners cut in from both edges. This will mean that the corners will be removed, as in the photo. For internal corners you may wish to experiment. For this 'H' I cut straight up between the 'legs' of the H and stopped a margin's distance from the cross bar. I then cut diagonally from this point to each of the inner corners. This creates a 'Y' shaped cut top and bottom.
Then it is simply a case of gluing the margins up to the side of your letter. Glue all the way around taking care to pull the material tight. Once this has done let the glue dry.
Next cut a strip of fabric that is around 2 cm wider than the depth of your letters. Fold over a one centimetre 'seam' and iron flat. Do the same at both ends.
With the folded edge to the front of your letter glue the strip around the edge of the shape. There will be overlap at the back of the letter which you can glue to the back of the letter, this will create a nice finish to the back edge. You can make this strip as long as the circumference of the letter if you want a clean finish but don't worry if the strip isn't too long. Just make another and continue around, just overlap the ends slightly as you start. I had to do this as my material wasn't long enough and it looks fine!
Stand back and admire your handi-work! You can stand the letters up or attach D-rings to the back (as I will do) so you can hang them on the wall!

Apologies for the 'Y' - this was before I mastered the 'folding it over at the back technique'!  Hand me the glue....
These letters are going to look wonderful, well I think! I am going for cream, a red gingham and red fabrics. Partly what I was looking for anyway and partly because I have the fabric already! In terms of relative cost well, I needed the letters and wood glue so these letters cost me around £2.50 each.  Obviously I didn't have to add the material cost in as I had it already but I think I could have done the whole name with a metre of fabric so my costs would have gone to around perhaps £4 a letter (depending on fabric) but still better than £10 each!!